Garlic Chives
Allium tuberosum
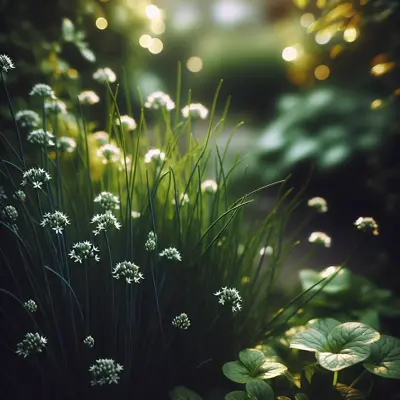
Wide, flat leaves are attractive and easy to harvest. Mild garlic flavor.
Harvest
80-90d
Days to harvest
Sun
Full sun
Zones
3–9
USDA hardiness
Height
6-4 inches
Planting Timeline
Showing dates for Garlic Chives in USDA Zone 7
All Zone 7 allium →Zone Map
Click a state to update dates
Garlic Chives · Zones 3–9
Growing Details
Complete Growing Guide
Light: Full sun (6 or more hours of direct sunlight a day). Soil: High Organic Matter. Soil pH: Neutral (6.0-8.0). Drainage: Good Drainage, Moist. Height: 0 ft. 6 in. - 0 ft. 4 in.. Spread: 1 ft. 0 in. - 1 ft. 0 in.. Spacing: Less than 12 inches. Growth rate: Medium. Maintenance: Medium. Regions: Coastal, Mountains, Piedmont.
Harvesting
Type: Capsule.
Edibility: Leaves, bulbs and flowers are edible. However, the plant also has poisonous characteristics as noted in the "Poisonous to Humans" section of this record. Toxicity can depend on the age of the person or animal, the age of the plant, the part of the plant ingested, how much is ingested, whether the person or animal has sensitivities or allergies, whether it's eaten raw or cooked, and so forth. Consult with a medical professional for further details.
Storage & Preservation
Fresh garlic chives stay crisp for 7-10 days when stored properly. Wrap unwashed leaves in slightly damp paper towels and place in perforated plastic bags in your refrigerator's crisper drawer. Wash just before using to prevent premature spoilage.
For drying, hang small bundles in a warm, well-ventilated area away from direct sunlight. Properly dried leaves retain their mild garlic flavor for 6-8 months when stored in airtight containers.
Freezing works excellently—chop clean leaves and freeze in ice cube trays with a little water or oil. These flavor cubes drop perfectly into soups and stir-fries. Alternatively, flash-freeze chopped leaves on baking sheets, then transfer to freezer bags for up to 8 months.
Garlic chive flowers make excellent herb vinegars. Pack fresh blooms into clean jars and cover with white wine or rice vinegar for delicate, floral-garlic flavored vinegars ready in 2-3 weeks.
History & Origin
Origin: Himalaya to China
Advantages
- +Attracts: Pollinators
Considerations
- -Toxic (Flowers, Fruits, Leaves, Roots, Seeds, Stems): Low severity
Companion Plants
Garlic chives earn their place near roses, peppers, and tomatoes mostly through scent. The sulfur compounds that make them sharp in the kitchen disorient aphids and other soft-bodied pests that locate host plants by smell — it's not a force field, just enough olfactory interference to reduce landing rates. Carrots and lettuce are good row partners too: both are short-statured and don't compete for light, and garlic chives' shallow roots at 6–8 inch spacing fit between rows without muscling anything out. In our zone 7 Georgia gardens, a clump or two at the base of a fruit tree does double duty — it discourages borers and keeps that bare soil from baking to a crust in July.
Beans and peas are the ones to separate out. Alliums produce root exudates that suppress Rhizobium bacteria — the same bacteria legumes depend on to fix atmospheric nitrogen. Plant garlic chives too close and your bean yields will tell you about it before you figure out why. Sage is a different problem: not chemistry so much as two plants chasing the same dry, well-drained niche. They'll crowd each other without either one thriving, so give them at least 18 inches of buffer or put them in separate beds entirely.
Plant Together
Tomatoes
Garlic chives repel aphids and spider mites that commonly attack tomatoes
Carrots
Chives improve carrot flavor and repel carrot rust flies
Roses
Natural pest deterrent against aphids and may reduce black spot disease
Cabbage
Repels cabbage worms, aphids, and other brassica pests
Lettuce
Provides natural slug and aphid protection without competing for nutrients
Strawberries
Deters slugs and ants while improving berry flavor
Peppers
Repels aphids and may help deter pepper maggots
Fruit Trees
Acts as living mulch and deters boring insects at tree base
Keep Apart
Beans
Alliums can inhibit nitrogen fixation in legumes and stunt growth
Peas
Sulfur compounds interfere with beneficial rhizobia bacteria needed for nitrogen fixation
Sage
Both are strong-scented herbs that can compete and reduce each other's essential oil production
Nutrition Facts
Per 100g serving. % Daily Value based on 2,000 calorie diet. Source: USDA FoodData Central (FDC #1104647)
Pests & Disease Resistance
Resistance
Generally disease-free, very hardy
Common Pests
Aphids, thrips (rarely problematic)
Diseases
Root rot in poorly drained soil
Troubleshooting Garlic Chives
What you'll see, why it happens, and what to do about it.
Leaf tips browning and curling, tiny insects visible on stems and undersides of leaves
Likely Causes
- Aphid colonies (commonly Myzus persicae or Aphis fabae) clustering at soft new growth
- Thrips feeding — less common on garlic chives than on other alliums, but it happens in hot, dry stretches
What to Do
- 1.Knock aphids off with a firm spray of water from a hose — do this in the morning so foliage dries before nightfall
- 2.If the infestation persists after a few days, apply insecticidal soap directly to the colonies, coating stems and leaf undersides
- 3.Avoid high-nitrogen fertilizer pushes mid-season; they produce the soft, sappy growth aphids prefer
Clumps yellowing from the base up, with mushy or blackened roots when you pull a division
Likely Causes
- Root rot — most often Pythium spp. — caused by consistently waterlogged soil or a bed with poor drainage
- Planting in a low spot that holds water after heavy rain
What to Do
- 1.Dig the affected clump, trim away rotted roots with clean shears, and replant in a raised bed or a spot with at least 12 inches of amended, well-draining soil
- 2.Hold off watering until the top 2 inches of soil are dry — garlic chives handle drought better than saturation, and rot moves faster than you'd expect once the roots stay wet
- 3.Amend heavy clay with coarse sand and compost before planting; NC State Extension flags poor drainage as the primary disease risk for this plant
Dense carpet of seedlings appearing around the parent clump every spring, crowding nearby crops
Likely Causes
- Garlic chives self-seed aggressively — each white flower head contains dozens of viable seeds
- Flower heads allowed to fully mature and shatter before deadheading
What to Do
- 1.Cut flower stalks down to the base as soon as blooms fade but before seed pods dry and split — timing matters more than technique here
- 2.If you already have a seedling carpet, thin or transplant the extras in spring when they're 3–4 inches tall; they move easily at that size
- 3.For long-term containment, sink a nursery pot (at least 12 inches deep and wide) into the bed and plant inside it — still deadhead for seed control, but lateral spread stops at the pot wall
Frequently Asked Questions
How long do garlic chives take to grow from seed?▼
Can you grow garlic chives in containers?▼
What's the difference between garlic chives and regular chives?▼
Are garlic chives good for beginner gardeners?▼
When should I plant garlic chives?▼
Do garlic chives come back every year?▼
Zone-by-Zone Planting Calendar
| Zone | Indoor Start | Transplant | Direct Sow | Harvest |
|---|---|---|---|---|
| Zone 3 | — | — | May – June | July – October |
| Zone 4 | — | — | April – June | July – October |
| Zone 5 | — | — | April – May | July – November |
| Zone 6 | — | — | April – May | June – November |
| Zone 7 | — | — | March – May | June – November |
| Zone 8 | — | — | March – April | May – December |
| Zone 9 | — | — | February – March | April – December |
| Zone 10 | — | — | January – March | April – December |
| Zone 1 | — | — | June – July | August – September |
| Zone 2 | — | — | May – July | August – September |
| Zone 11 | — | — | January – February | March – December |
| Zone 12 | — | — | January – February | March – December |
| Zone 13 | — | — | January – February | March – December |
Growing Guides from Wind River Greens
Sources & References
External authority sources used in compiling this guide.
- ExtensionNC State Extension
- USDAUSDA FoodData Central
See the Methodology page for how this data is sourced, what's AI-assisted, and known limitations.
More Alliums
Build your planting calendar
Get a month-by-month schedule of when to start, transplant, and harvest.