Sunflower Microgreens
Helianthus annuus
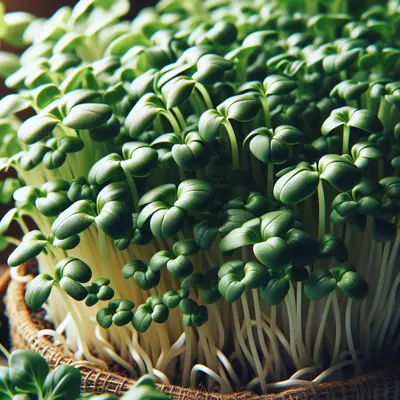
Sunflower Microgreens are young sunflower seedlings harvested at 10-14 days, featuring bright green cotyledons with pale yellow stems. These easy-to-grow microgreens reach maturity quickly and are notably more tender than their sprout counterparts. They deliver a distinctive nutty, slightly sweet flavor with a satisfying crunch that works well in salads, sandwiches, and grain bowls. Rich in vitamins, minerals, and antioxidants, sunflower microgreens are a popular choice for health-conscious growers seeking nutritious homegrown greens with minimal effort.
Harvest
85-95d
Days to harvest
Sun
Full sun
Zones
2–11
USDA hardiness
Height
1-10 feet
Planting Timeline
Showing dates for Sunflower Microgreens in USDA Zone 7
All Zone 7 microgreen →Zone Map
Click a state to update dates
Sunflower Microgreens · Zones 2–11
Growing Details
Succession Planting
Sunflower microgreens go from seed to harvest in roughly 10-14 days under normal indoor conditions, which makes staggered sowing almost required for a steady supply. Start a fresh 10x20 tray every 5-7 days and you'll have continuous cuts without a gap week. There's no seasonal cutoff to plan around — as long as your grow space holds between 65°F and 80°F, this cadence runs year-round.
Complete Growing Guide
Sunflower Microgreens can be started either indoors in containers or direct-sown into garden beds, making them versatile for different growing situations. If you live in a region with a defined frost date, start seeds indoors 4-6 weeks before your last spring frost, or direct sow once soil has warmed and frost danger has passed. For year-round greenhouse production, timing becomes more flexible—this variety's day-length neutral characteristic means you can succession plant every two weeks for continuous harvests without worrying about seasonal light changes.
Prepare your soil with good drainage in mind; Sunflower Microgreens performs best in loose, well-draining potting mix or garden soil amended with compost. Space seeds or seedlings 6-8 inches apart to account for the variety's sturdy, branching habit and the eventual width of mature plants. Plant seeds about one-half inch deep, pressing them firmly into soil to ensure good contact. The larger seeds characteristic of sunflowers make handling easier than smaller microgreen varieties, so direct sowing becomes quite practical for gardeners of any experience level.
Water consistently but carefully throughout the growing season. Sunflower Microgreens are particularly susceptible to damping off and mold when soil remains waterlogged or air circulation is poor. Water at soil level rather than overhead, and allow the top inch of soil to dry slightly between waterings. Once plants are established and actively growing, feed with a balanced fertilizer every 2-3 weeks, or use slow-release granules mixed into your soil at planting time. The branching tendency and potential for 20-25 stems per plant means this variety appreciates consistent nutrition to support that prolific growth.
In indoor greenhouse environments, watch carefully for fungus gnats and aphids, which find Sunflower Microgreens particularly appealing. Check leaf undersides regularly starting at week three, and maintain good air circulation with fans to discourage pest populations. Outdoors, these pests are less problematic, but damping off remains a constant threat during germination and early seedling stages, especially if humidity stays high without adequate ventilation.
The most common mistake gardeners make with Sunflower Microgreens is overcrowding. While their branching habit produces many stems, cramming plants too closely together reduces air circulation dramatically, creating perfect conditions for fungal disease. Give each plant adequate space even though it seems wasteful initially—the payoff in healthy, vigorous growth and disease prevention makes proper spacing essential for success.
Pruning is optional but beneficial. Once plants reach about 12 inches tall, you can pinch out the central growing tip to encourage more branching and potentially increase your final stem count even beyond the impressive 20-25 typical yield. With 85-95 days to maturity and full-sun requirements, this reliable AAS Winner rewards gardeners with abundant, sturdy flowers perfect for cutting or display.
Harvesting
Harvest Sunflower Microgreens when the first true leaves have fully emerged and the stems display a vibrant green color with a firm, sturdy feel—typically around 10-14 days after sprouting. The cotyledons should remain plump and bright, signaling peak nutrition and flavor. For continuous harvests, cut stems just above the soil line and allow the plant to regenerate for a second, smaller flush within 7-10 days; alternatively, pull the entire plant for a single, maximum yield of 20-25 stems. Time your harvest in the morning after moisture has dried from the leaves, as this ensures optimal crispness and extends storage life in the refrigerator.
Seeds are ovoid and somewhat flattened
Color: Black, Brown/Copper. Type: Achene. Length: < 1 inch. Width: < 1 inch.
Garden value: Edible
Harvest time: Fall
Edibility: Seeds are used for cooking oil, livestock feed, and as a snack food or garnish. Petals are edible and young flower buds can be steamed like artichokes.
Storage & Preservation
Store fresh sunflower microgreens in the refrigerator immediately after harvest, placing them in a breathable container lined with paper towels to absorb excess moisture. They maintain peak quality for 5-7 days when kept at 32-36°F with high humidity.
For best texture and flavor, consume within 3 days of harvest. Unlike delicate microgreens, sunflowers' sturdy structure allows them to hold up well in refrigerated storage, though their signature crunch gradually diminishes.
Freezing works well for smoothies and cooked applications—flash freeze on parchment paper, then store in sealed bags for up to 3 months. Dehydrating at low temperatures (95-105°F) creates nutritious chips that retain much of their nutty flavor. Avoid blanching before preservation as it destroys their appealing texture. Sunflower microgreens aren't suitable for traditional canning due to their delicate nature and low acidity.
History & Origin
Documentation on the specific origins of Sunflower Microgreens is limited, though the variety represents a modern breeding advancement within Helianthus annuus. The description identifies it as a larger-flowered sibling to the variety Sonja, suggesting it emerged from deliberate selection work aimed at producing branching sunflowers with enhanced stem thickness and flower size. Its recognition as the first sunflower to win an All-America Selections award indicates professional horticultural breeding, likely developed during the mid-to-late twentieth century by a major seed company or university program. However, specific breeder names, exact year of introduction, and geographic origin remain undocumented in readily available sources, leaving the precise lineage somewhat obscured despite its commercial significance.
Origin: Western United States
Advantages
- +Nutty, slightly sweet flavor with satisfying crunch appeals to diverse palates
- +Large 4-6 inch blooms yield 20-25 stems per plant for abundance
- +Sturdy 35-48 inch stems work well for floral arrangements and displays
- +Day-length neutral trait enables reliable year-round greenhouse production
- +AAS award winner ensures proven quality and consistent performance
Considerations
- -Damping off disease requires careful moisture management and excellent drainage
- -Fungus gnats and aphids commonly infest indoor growing environments
- -Mold development occurs easily with poor ventilation or overwatering
- -85-95 day maturation period is longer than many competing varieties
Companion Plants
Sunflower microgreens grow indoors in trays, so traditional in-ground companion logic doesn't transfer — but rack placement still matters if you're running multiple crops. Radish microgreens are the most practical tray-mate: they finish in 5-7 days and clear the rack before sunflowers reach their 10-12 day harvest window, so there's no competition for space or airflow. Basil shares the same temperature floor (above 65°F) and similar ventilation needs, making it a low-friction neighbor on the same rack. Skip mint entirely — its volatile oils can bleed into the mild, nutty flavor sunflower microgreens are grown for, and that's not a trade worth making.
Plant Together
Basil
Repels aphids and thrips that commonly attack microgreens, aromatic compounds may enhance growth
Chives
Natural fungicide properties help prevent damping-off disease common in microgreen production
Marigold
Releases compounds that deter spider mites and aphids while reducing soil-borne pathogens
Lettuce
Similar growing conditions and nutrient requirements, compatible root systems
Cilantro
Attracts beneficial insects and has similar water and light requirements
Radish Microgreens
Compatible growth rates and harvesting schedule, may improve soil aeration
Parsley
Helps repel pests and has complementary nutrient uptake patterns
Nasturtium
Acts as trap crop for aphids and cucumber beetles, edible flowers complement microgreen dishes
Keep Apart
Fennel
Produces allelopathic compounds that inhibit seed germination and early growth
Black Walnut
Releases juglone toxin that severely stunts growth and causes wilting
Mint
Aggressive root system competes for nutrients and can overwhelm delicate microgreen roots
Nutrition Facts
Per 100g serving. % Daily Value based on 2,000 calorie diet. Source: USDA FoodData Central (FDC #2515381)
Pests & Disease Resistance
Resistance
Resistant to most diseases when grown with proper air circulation
Common Pests
Fungus gnats, aphids in indoor environments
Diseases
Damping off, mold from poor ventilation or overwatering
Troubleshooting Sunflower Microgreens
What you'll see, why it happens, and what to do about it.
White fluffy mold growing on the soil surface or at stem bases within the first 3-5 days
Likely Causes
- Botrytis or Pythium mold from excess moisture and poor airflow
- Overwatering during the blackout/germination phase
What to Do
- 1.Remove the humidity dome or blackout cover 12-24 hours early to let the surface dry slightly
- 2.Bottom-water only — pour into the tray below and let the medium wick it up, so the surface stays drier
- 3.Point a small fan at low speed across the trays for 30-60 minutes twice a day
Seedlings falling over at the soil line, stems look pinched or water-soaked, around day 3-5
Likely Causes
- Damping off (Pythium or Rhizoctonia spp.) from overwatering and low airflow
- Reusing trays that weren't sanitized between grows
What to Do
- 1.Toss the affected tray — damping off spreads fast and there's no saving a tray once it's hit
- 2.Sanitize trays with a 1:10 bleach-to-water solution and rinse thoroughly before the next grow
- 3.Cut watering frequency and confirm you have active air circulation in the grow space
Hulls stuck on cotyledon leaves after emergence, leaves can't open fully
Likely Causes
- Insufficient downward pressure during germination — sunflower seeds need resistance to shed the hull as they push up
- Low humidity during the blackout phase dries the hull so it grips the leaf instead of releasing
What to Do
- 1.Stack a second tray on top of the seeded tray and add 5-10 lbs of weight (a full water jug works) for the full 2-4 day germination period
- 2.Mist stuck hulls with a spray bottle, wait 60 seconds, then pinch them off gently — pulling hard tears the cotyledon
Tiny slow-moving insects in the growing medium, seedlings yellowing or stunted around day 7-10
Likely Causes
- Fungus gnats (Bradysia spp.) — larvae feed on roots and organic matter in the medium
- A surface that stays wet between waterings, which is exactly the environment Bradysia larvae need to complete their cycle
What to Do
- 1.Switch to bottom-watering exclusively so the top layer of medium dries out between cycles — larvae can't survive a dry surface
- 2.Place yellow sticky traps flat on the tray surface to catch adults and get a read on how bad the population is
- 3.If the infestation is heavy, drench the medium with a diluted hydrogen peroxide solution (1 part 3% H2O2 to 4 parts water) to knock back larvae without harming seeds
Frequently Asked Questions
How long do sunflower microgreens take to grow?▼
Do I need hulled sunflower seeds for microgreens?▼
Why are my sunflower microgreens moldy?▼
Can you regrow sunflower microgreens after cutting?▼
What do sunflower microgreens taste like?▼
Are sunflower microgreens good for beginners?▼
Zone-by-Zone Planting Calendar
| Zone | Indoor Start | Transplant | Direct Sow | Harvest |
|---|---|---|---|---|
| Zone 1 | January – December | — | — | January – December |
| Zone 2 | January – December | — | — | January – December |
| Zone 11 | January – December | — | — | January – December |
| Zone 12 | January – December | — | — | January – December |
| Zone 13 | January – December | — | — | January – December |
| Zone 3 | January – December | — | — | January – December |
| Zone 4 | January – December | — | — | January – December |
| Zone 5 | January – December | — | — | January – December |
| Zone 6 | January – December | — | — | January – December |
| Zone 7 | January – December | — | — | January – December |
| Zone 8 | January – December | — | — | January – December |
| Zone 9 | January – December | — | — | January – December |
| Zone 10 | January – December | — | — | January – December |
Growing Guides from Wind River Greens
Sources & References
External authority sources used in compiling this guide.
See the Methodology page for how this data is sourced, what's AI-assisted, and known limitations.
More Microgreens
Build your planting calendar
Get a month-by-month schedule of when to start, transplant, and harvest.