Spinach Microgreens
Spinacia oleracea
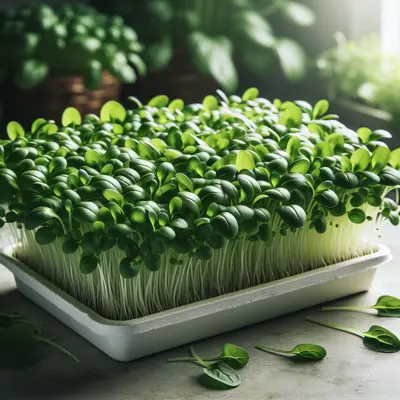
Spinach microgreens are tender, delicate seedlings with small oval leaves and a vibrant green color. They reach harvest maturity in approximately 25 days, making them a moderately quick crop compared to full-size spinach. The key differentiator is their concentrated nutrient density—microgreens pack significantly more vitamins and minerals per gram than mature leaves. They deliver a mild, clean flavor with subtle sweetness and no bitterness, making them ideal for raw applications like salads, smoothie bowls, and garnishes. Their tender texture and refined taste work well in both culinary and presentation-focused dishes.
Harvest
25d
Days to harvest
Sun
Full sun to partial shade
Zones
2–11
USDA hardiness
Height
6-12 inches
Planting Timeline
Showing dates for Spinach Microgreens in USDA Zone 7
All Zone 7 microgreen →Zone Map
Click a state to update dates
Spinach Microgreens · Zones 2–11
Growing Details
Succession Planting
Spinach microgreens go from seed to harvest in about 25 days, so succession is simple math: start a new tray every 7–10 days to keep a steady supply coming in. A standard 10x20 tray yields enough for several servings, so two or three trays in rotation at any given time covers most households without waste. Because this is a fully indoor crop with no seasonal ceiling, you can run that cadence year-round.
The one variable worth watching is room temperature. Spinach microgreens do best at 60–72°F; above 75°F, germination gets patchy and the cotyledons turn bitter faster once they're ready. If your grow space heats up in summer, shift trays to a cooler room or stretch succession intervals to 10–14 days so you're not harvesting more than you can use before quality drops.
Complete Growing Guide
Spinach microgreens are best started indoors using the microgreen growing method, which differs significantly from traditional spinach cultivation. Rather than timing your planting around the last frost date, microgreen production is year-round and works entirely indoors under controlled conditions. You can sow seeds densely in shallow trays filled with moistened potting mix any time of year, making this variety ideal for continuous harvesting throughout the seasons without weather constraints.
For soil preparation, use a lightweight, well-draining seed-starting mix rather than heavy garden soil. Spinach microgreens prefer shallow growing medium, typically one to two inches deep, as they develop their characteristic smooth to slightly savoyed medium-green leaves quickly in this compact environment. Sow seeds densely—much more densely than you would traditional spinach—pressing them gently into the moist soil surface without covering them, as light aids germination. Expect sprouting within three to five days and harvest-ready microgreens in approximately 25 days from sowing.
Watering requires careful attention with spinach microgreens. Keep the soil consistently moist but never waterlogged, as excess moisture invites damping off disease, a particular concern for this variety. Water from below by setting trays in a water bath for ten to fifteen minutes, or mist gently from above once daily. Feeding is unnecessary for microgreens since you're harvesting before the plant's true leaf stage; the seed's stored nutrients provide sufficient nutrition for the brief growing cycle.
Spinach microgreens face specific pest pressures indoors that differ from outdoor varieties. While aphids and leaf miners are listed as potential pests, indoor cultivation virtually eliminates leaf miner risk. However, aphids can still infiltrate indoor growing spaces, particularly if seedlings are started near windows or if contaminated soil is used. Inspect transplants and tools carefully, and maintain scrupulous cleanliness around your growing area. The more significant concern for this variety is downy mildew in humid conditions—spinach microgreens are particularly susceptible when humidity exceeds sixty percent. Ensure adequate air circulation with a small fan running several hours daily, and avoid overhead watering that leaves foliage wet.
The most common mistake gardeners make with spinach microgreens involves overestimating light requirements. While these microgreens tolerate full sun to partial shade outdoors (four to six hours minimum), most indoor growers mistakenly provide insufficient light, resulting in weak, pale, leggy growth. Position your trays under grow lights kept six to eight inches above the seedlings, running lights for twelve to fourteen hours daily. This ensures the dense, vibrant medium-green coloring these microgreens are known for develops properly. For succession planting, start a new tray every three to five days to maintain a continuous harvest, which maximizes your indoor space efficiency.
Harvesting
Spinach microgreens reach peak harvest readiness when the smooth to slightly savoyed leaves display a vibrant medium-green color and measure between 6 to 12 inches tall, with the first true leaves fully expanded and the stem feeling firm yet tender to the touch. At this 25-day mark, the mild, clean flavor develops its characteristic slight sweetness without any bitter notes, indicating optimal nutrient density. For best results, employ a single-harvest approach by cutting the entire crop just above the soil line using sharp scissors, rather than continuous picking, which preserves the tender texture and ensures uniform quality. Timing the harvest in the early morning, after the leaves have absorbed overnight moisture but before intense heat develops, maximizes crispness and shelf life.
Spiny husk (utricle).
Color: Brown/Copper, Cream/Tan. Type: Achene. Length: < 1 inch. Width: < 1 inch.
Harvest time: Summer
Edibility: Leaves can be eaten fresh or cooked. Harvest only as needed as fresh leaves only keep in the refrigerator for a few days. Freeze for longer storage.
Storage & Preservation
Fresh spinach microgreens are highly perishable and should be used within 3-5 days of harvest for best quality. Store unwashed microgreens in the refrigerator between 35-40°F in a breathable container—plastic clamshells with ventilation holes work perfectly. Place a paper towel in the bottom to absorb excess moisture.
For slightly longer storage, gently wash and thoroughly dry the microgreens before refrigerating. Never store wet microgreens as they'll quickly develop mold and decay.
Freezing isn't recommended for fresh consumption as it destroys the delicate texture, but frozen spinach microgreens work well blended into smoothies. Simply spread clean, dry microgreens on a baking sheet, freeze until solid, then transfer to freezer bags.
Dehydrating is another preservation option—use the lowest temperature setting (95°F) and dry until crispy. Store dried microgreens in airtight containers for up to 6 months. These work well as seasoning powders or smoothie additions.
History & Origin
Spinach microgreens derive directly from *Spinacia oleracea*, a crop domesticated in Persia (modern-day Iran) during the medieval period and subsequently spread throughout the Mediterranean and Europe by the 11th century. The specific cultivar origins of spinach microgreens as a distinct horticultural practice remain undocumented in academic literature, reflecting the relatively recent emergence of microgreens as a commercial category beginning in the 1980s. Rather than representing a formally bred variety, spinach microgreens simply capitalize on the fast-growing, tender juvenile leaves of standard spinach germplasm, making them accessible to home and commercial growers without specialized breeding history.
Origin: Central Asia to SW. Siberia
Advantages
- +Mild, clean flavor with slight sweetness appeals to diverse palates
- +Fast 25-day growth cycle enables quick harvests and frequent rotations
- +Smooth to slightly savoyed leaves provide appealing texture variation
- +No bitterness makes spinach microgreens suitable for sensitive eaters
Considerations
- -Damping off and downy mildew require careful humidity management indoors
- -Moderate difficulty level demands more attention than easier microgreen varieties
- -Humid conditions create disease pressure requiring vigilant environmental control
Companion Plants
Spinach microgreens are almost always grown indoors in trays, so traditional in-ground companion planting doesn't apply directly — but what shares your shelf still matters. Lettuce, arugula microgreens, and pea shoots make practical tray neighbors because they run on the same bottom-watering schedule and none of them produce compounds that interfere with spinach germination. Radish microgreens are worth calling out specifically: they sprout in 3–4 days and finish around day 7–10, so you can pull the radish tray right as your spinach enters its most light-hungry phase — freeing up shelf space and airflow at the exact moment spinach needs both. Kale microgreens work the same way; stagger them 5–7 days behind your spinach sow and you get a rolling harvest off a single grow light setup without any of them competing.
Fennel is the one to keep in a different room entirely. It produces anethole and related allelopathic compounds that suppress germination in many crops, and spinach is sensitive enough that even a nearby tray can cause uneven stands. Sunflower microgreens cause trouble for a simpler reason: they routinely hit 8–12 inches, and if they're on the same shelf level they'll shade a spinach tray hard within a few days of uncovering. Buckwheat microgreens can release phytotoxic compounds as the spent medium breaks down, which is mostly a concern if you're composting used trays in a tight grow space rather than removing them promptly.
Plant Together
Lettuce
Similar growing requirements and harvest timing, efficient space utilization
Radish Microgreens
Compatible growth rates and helps break up soil compaction
Arugula Microgreens
Similar cool-season preferences and harvest schedule
Pea Shoots
Nitrogen fixation benefits spinach growth and similar moisture needs
Chives
Natural pest deterrent against aphids and thrips
Cilantro
Attracts beneficial insects and has similar growing conditions
Kale Microgreens
Compatible brassica family with similar nutrient and light requirements
Mint
Repels ants and rodents that may damage microgreen trays
Keep Apart
Fennel
Releases allelopathic compounds that inhibit spinach germination and growth
Sunflower Microgreens
Produces allelopathic substances that can stunt spinach growth
Buckwheat Microgreens
Aggressive growth can overshadow and compete with slower-growing spinach
Nutrition Facts
Per 100g serving. % Daily Value based on 2,000 calorie diet. Source: USDA FoodData Central (FDC #167782)
Pests & Disease Resistance
Resistance
Downy Mildew races 1-3, 5, 6, 8, 9, 11, 12, 14, 16, 19 (High)
Common Pests
Aphids, leaf miners (rare indoors)
Diseases
Damping off, downy mildew in humid conditions
Troubleshooting Spinach Microgreens
What you'll see, why it happens, and what to do about it.
Seedlings collapse at the soil line, toppling over between days 3–7 after germination
Likely Causes
- Damping off (Pythium or Rhizoctonia spp.) — fungal pathogens that thrive in waterlogged, poorly ventilated trays
- Overwatering from the top, which keeps the surface constantly wet
What to Do
- 1.Switch to bottom watering only — set the tray in 1–2 inches of water for 10–15 minutes, then let it drain completely
- 2.Run a small fan on low across the tray surface to improve air circulation
- 3.Discard the affected tray and sterilize it with a 10% bleach solution before reuse; damping off spreads fast and there's no saving a tray once it hits
White or gray fuzzy growth on the undersides of cotyledons, usually appearing in a stuffy grow room or during a stretch of humid weather
Likely Causes
- Downy mildew (Peronospora farinosa f. sp. spinaciae) — favors humidity above 85% and temperatures between 46–61°F
- Trays stacked or crowded too close together, blocking airflow between them
What to Do
- 1.Space trays at least 2–3 inches apart so air can move between them
- 2.Drop humidity below 70% if you can; a small dehumidifier in a grow tent makes a real difference
- 3.Harvest immediately at first sign — spinach microgreens at day 10–14 are still perfectly edible; don't wait for full development if mildew is moving in
Pale yellow or washed-out cotyledons that won't green up past day 10
Likely Causes
- Insufficient light — spinach microgreens need 4–6 hours of direct sun or 12–16 hours under a grow light at 2,000–3,000 lux minimum
- Blackout period extended too long — leaving the tray covered past day 5 starves seedlings of the light they need to build chlorophyll
What to Do
- 1.Move the tray to a south-facing window or position grow lights 2–4 inches above the canopy
- 2.Remove the blackout dome or cover by day 4–5 once the majority of seeds have sprouted, regardless of how tall they are
- 3.If using grow lights, check output with a cheap lux meter — anything under 1,500 lux will produce weak, pale greens that don't recover
Tiny soft-bodied insects clustered on stems or leaf undersides, usually appearing after day 14
Likely Causes
- Aphids (Myzus persicae or similar) — more common in warm indoor setups, especially if nearby houseplants are already infested
- A single infested plant nearby is usually the entry point
What to Do
- 1.Harvest immediately — spinach microgreens past day 14 are ready anyway, and there's no good reason to spray food you'll eat within days
- 2.Check any adjacent trays and houseplants; aphids move between trays quickly at typical indoor temps of 65–75°F
- 3.Going forward, keep the grow area clear of plants that commonly harbor aphids — peppers and citrus are frequent culprits indoors
Frequently Asked Questions
How long do spinach microgreens take to grow?▼
Do I need to soak spinach seeds before planting microgreens?▼
Can you regrow spinach microgreens after cutting?▼
What do spinach microgreens taste like?▼
Are spinach microgreens good for beginners?▼
Can you grow spinach microgreens without soil?▼
Zone-by-Zone Planting Calendar
| Zone | Indoor Start | Transplant | Direct Sow | Harvest |
|---|---|---|---|---|
| Zone 3 | January – December | — | — | January – December |
| Zone 4 | January – December | — | — | January – December |
| Zone 5 | January – December | — | — | January – December |
| Zone 6 | January – December | — | — | January – December |
| Zone 7 | January – December | — | — | January – December |
| Zone 8 | January – December | — | — | January – December |
| Zone 9 | January – December | — | — | January – December |
| Zone 10 | January – December | — | — | January – December |
| Zone 1 | January – December | — | — | January – December |
| Zone 2 | January – December | — | — | January – December |
| Zone 11 | January – December | — | — | January – December |
| Zone 12 | January – December | — | — | January – December |
| Zone 13 | January – December | — | — | January – December |
Growing Guides from Wind River Greens
Sources & References
External authority sources used in compiling this guide.
- ExtensionNC State Extension
- USDAUSDA FoodData Central
See the Methodology page for how this data is sourced, what's AI-assisted, and known limitations.
More Microgreens
Build your planting calendar
Get a month-by-month schedule of when to start, transplant, and harvest.