Mung Bean Microgreens
Vigna radiata
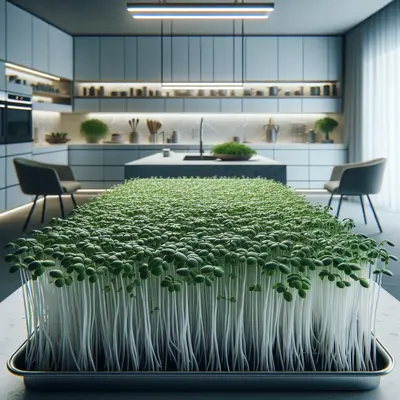
Popular in Asian cuisine, often stir-fried to accompany meals. 1/4 cup of seed yields approx. 2-3 cups of sprouts. Mung Bean can also be grown in open-flat trays as shoots; harvest as soon as first true leaves open for optimal taste and texture. Very fast maturing with attractive green leaves and pink stems. All of Johnny's high-germination sprouting seeds have tested negative for the presence of E. coli 0157 and Salmonella.
Harvest
6-10d
Days to harvest
Sun
Bright indirect light
Zones
11–11
USDA hardiness
Height
3 feet
Planting Timeline
Showing dates for Mung Bean Microgreens in USDA Zone 7
All Zone 7 microgreen →Zone Map
Click a state to update dates
Mung Bean Microgreens · Zones 11–11
Growing Details
Succession Planting
Mung bean microgreens go from seed to harvest in 6-10 days, which means succession isn't optional — it's the whole production model. Start a fresh 10x20 tray every 3-4 days and you'll maintain a steady cut supply without a week-long glut followed by nothing. Because these grow indoors with no heat or cold constraint, there's no calendar stop date. The only real ceiling is how many trays fit under your lights at once.
Complete Growing Guide
You'll find mung bean microgreens among the most forgiving and fastest microgreens to grow, making them perfect for beginners. Start by soaking your mung bean seeds for 8-12 hours in cool water—this softens the seed coat and ensures even germination. After soaking, rinse and drain thoroughly.
Choose a shallow growing tray with drainage holes and fill with 1-2 inches of soilless growing medium like coconut coir, peat moss, or specialized microgreen growing mats. Avoid garden soil, which retains too much moisture and can harbor pathogens. Spread your soaked seeds evenly across the surface in a single layer—they should nearly touch but not overlap. Mist the seeds and growing medium until thoroughly damp but not waterlogged.
Cover your tray with another inverted tray or blackout cover for the first 2-3 days. This creates the humid, dark environment mung beans need for strong stem development. Check daily and mist if the surface appears dry, but avoid overwatering, which leads to damping off.
Once your seedlings reach 1-2 inches and push against the cover, remove it and place the tray under bright indirect light or grow lights. Position LED grow lights 12-18 inches above the tray and run them for 12-16 hours daily. Direct sunlight can be too intense and cause the delicate leaves to wilt.
Maintain consistent moisture by misting 1-2 times daily, preferably in the morning. The growing medium should feel like a wrung-out sponge—moist but not soggy. Good air circulation prevents fungal issues, so avoid crowding trays and ensure adequate ventilation.
Common mistakes include using too much water (leading to root rot), insufficient drainage, and removing the blackout cover too early. Watch for pale, leggy growth, which indicates inadequate light, or dark, musty-smelling roots, which signal overwatering. Mung bean microgreens don't require fertilization during their short growing cycle—the seed provides all necessary nutrients.
Harvesting
Harvest your mung bean microgreens when they reach 3-4 inches tall with fully opened cotyledon leaves, typically 6-10 days after sowing. Look for thick, white stems and bright green leaves—the cotyledons should be fully expanded and the first true leaves may just be emerging.
Harvest in the morning when the plants are most turgid and crisp. Using clean, sharp scissors, cut the stems about 1/2 inch above the growing medium. Cut in small sections rather than trying to harvest the entire tray at once, which helps maintain freshness. The stems should make a clean snap when cut—if they bend or feel rubbery, they may be overwatered.
Avoid pulling the microgreens from the roots, which can introduce growing medium into your harvest and reduce shelf life. Cut just what you need, as unharvested microgreens will stay fresh longer in the tray. After cutting, gently shake off any loose seed hulls or growing medium, but avoid washing until you're ready to use them, as excess moisture reduces storage life.
Storage & Preservation
Store freshly harvested mung bean microgreens in the refrigerator immediately after cutting. Place them in a breathable container or loosely closed plastic bag with a paper towel to absorb excess moisture. They'll maintain peak quality for 5-7 days when stored at 35-40°F with high humidity.
For longer storage, you can freeze mung bean microgreens, though they'll lose their crisp texture. Blanch quickly in boiling water for 30 seconds, shock in ice water, drain thoroughly, and freeze in portions. They work well frozen in smoothies and cooked dishes.
Dehydrating is another option—spread clean, dry microgreens on dehydrator trays and dry at 95°F until crisp, about 8-12 hours. Store dried microgreens in airtight containers for up to 6 months. While they lose their fresh crunch, dried mung bean microgreens make excellent garnishes and seasonings, retaining much of their nutritional value and mild, nutty flavor.
History & Origin
Mung beans (Vigna radiata) originated in the Indian subcontinent over 4,000 years ago, where they were first cultivated as drought-tolerant crops. Ancient Sanskrit texts reference mung beans, and they spread throughout Asia via trade routes, becoming staples in Chinese, Thai, and Korean cuisines.
The practice of growing mung bean sprouts dates back thousands of years in Asian cultures, particularly in China during the Han Dynasty (206 BCE - 220 CE). Traditional Chinese medicine valued mung bean sprouts for their cooling properties and nutritional density.
Microgreen cultivation as we know it today emerged in the 1980s in upscale California restaurants, but mung beans were among the first varieties adopted due to their reliability and familiar flavor profile. The modern microgreen movement embraced mung beans because they germinate consistently, grow quickly, and appeal to both Asian and Western palates.
Today, mung bean microgreens represent a bridge between ancient sprouting traditions and contemporary microgreen farming, maintaining their reputation as one of the most dependable varieties for commercial and home growers alike.
Advantages
- +Extremely reliable germination rate (95%+) even with older seeds
- +Fast harvest cycle of just 6-10 days from seed to plate
- +Produces substantial yields with thick, meaty stems that add significant bulk to dishes
- +Rarely suffers from damping off when grown in proper conditions
- +Seeds are inexpensive and widely available, making them cost-effective for continuous growing
- +Tolerates slight overwatering better than most microgreen varieties
- +Appeals to all age groups with mild, non-bitter flavor profile
Considerations
- -Seed hulls can be stubborn and may stick to leaves during harvest
- -Stems can become tough and fibrous if harvested too late
- -Limited flavor complexity compared to more distinctive microgreen varieties
- -Requires complete darkness for first 2-3 days, making timing more critical than some varieties
Companion Plants
Mung bean microgreens are an indoor crop, so companion planting is really about what you grow on the same shelf. Basil and cilantro are fine neighbors — similar watering cadence, no root competition since each crop lives in its own tray. Lettuce, spinach, and arugula microgreens also share a 12-16 hour light setup without issue. Keep mint in a separate container well away from the rest; it produces terpenes that can suppress germination in neighboring trays. Fennel produces anethole, a compound documented to inhibit sprouting in several species, so don't run it in the same batch.
Plant Together
Basil
Repels aphids and thrips while attracting beneficial insects
Cilantro
Similar growing conditions and helps repel spider mites
Lettuce
Compatible growing requirements and doesn't compete for nutrients
Radish
Quick germination helps break soil crust and deters flea beetles
Chives
Natural fungicide properties help prevent damping-off disease
Spinach
Similar light and moisture needs, grows well in close proximity
Arugula
Compatible growth habits and may help deter aphids
Mint
Repels ants and rodents that might disturb microgreen trays
Keep Apart
Fennel
Produces allelopathic compounds that inhibit germination and growth
Sunflower
Releases growth-inhibiting chemicals through root exudates
Black Walnut
Produces juglone toxin that severely stunts legume growth
Nutrition Facts
Per 100g serving. % Daily Value based on 2,000 calorie diet. Source: USDA FoodData Central (FDC #167782)
Pests & Disease Resistance
Resistance
Generally disease-free when grown in clean conditions
Common Pests
Aphids, fungus gnats (indoor growing)
Diseases
Damping off, root rot from overwatering
Troubleshooting Mung Bean Microgreens
What you'll see, why it happens, and what to do about it.
Seeds rotting or sprouting unevenly by day 3, with a sour smell coming off the tray
Likely Causes
- Damping off (Pythium or Rhizoctonia spp.) — triggered by standing water and poor airflow
- Seeding too thick, which traps moisture between seeds and prevents even germination
What to Do
- 1.Rinse seeds twice daily if sprouting without a growing medium, and drain completely — seeds should never sit in pooled water
- 2.Back off to 1 oz per 10x20 tray if you've been seeding at the high end; mung beans swell considerably and need room
- 3.Run a small fan nearby to keep air moving — Pythium spreads fast in still, humid conditions
Stems are pale, stretched, and flopping over by day 5-6 instead of standing upright
Likely Causes
- Light deficiency — grow lights too far away or ambient light too dim
- Blackout period extended past day 3, which encourages etiolation in Vigna radiata
What to Do
- 1.Move grow lights to within 2-4 inches of the tray surface and run them 12-16 hours per day
- 2.Transition trays out of the blackout dome by day 2-3, once sprout tips are just showing
- 3.A south-facing window works in summer, but supplemental LED lighting is more consistent when days are short
Tiny flying insects around the tray; roots look brown and mushy at harvest around day 8-10
Likely Causes
- Fungus gnats (Bradysia spp.) — adults lay eggs in moist growing medium, larvae chew roots
- Continuous surface moisture from top-watering that never lets the medium dry between cycles
What to Do
- 1.Switch to bottom-watering only — pour into the drainage tray and let the medium wick up from below so the surface dries between waterings
- 2.Hang a yellow sticky trap near the shelf to catch adults and get a count on how bad the pressure is
- 3.For future trays, a 1/4-inch top-dressing of dry medium discourages Bradysia egg-laying at the surface
Frequently Asked Questions
How long do mung bean microgreens take to grow?▼
Do mung bean microgreens need to be kept in the dark?▼
Can you eat mung bean microgreens raw?▼
What do mung bean microgreens taste like?▼
Are mung bean microgreens good for beginners?▼
How do you prevent mung bean microgreens from getting moldy?▼
Zone-by-Zone Planting Calendar
| Zone | Indoor Start | Transplant | Direct Sow | Harvest |
|---|---|---|---|---|
| Zone 3 | January – December | — | — | January – December |
| Zone 4 | January – December | — | — | January – December |
| Zone 5 | January – December | — | — | January – December |
| Zone 6 | January – December | — | — | January – December |
| Zone 7 | January – December | — | — | January – December |
| Zone 8 | January – December | — | — | January – December |
| Zone 9 | January – December | — | — | January – December |
| Zone 10 | January – December | — | — | January – December |
| Zone 1 | January – December | — | — | January – December |
| Zone 2 | January – December | — | — | January – December |
| Zone 11 | January – December | — | — | January – December |
| Zone 12 | January – December | — | — | January – December |
| Zone 13 | January – December | — | — | January – December |
Growing Guides from Wind River Greens
Sources & References
External authority sources used in compiling this guide.
See the Methodology page for how this data is sourced, what's AI-assisted, and known limitations.
More Microgreens
Build your planting calendar
Get a month-by-month schedule of when to start, transplant, and harvest.