Planting Timeline
Showing dates for Common Chives in USDA Zone 7
All Zone 7 herb →Zone Map
Click a state to update dates
Common Chives · Zones 3–9
Growing Details
Zone-by-Zone Planting Calendar
| Zone | Indoor Start | Transplant | Direct Sow | Harvest |
|---|---|---|---|---|
| Zone 3 | February – March | May – June | April – September | July – October |
| Zone 4 | February – March | May – June | April – September | June – October |
| Zone 5 | February – March | April – May | March – September | June – November |
| Zone 6 | January – March | April – May | March – October | May – November |
| Zone 7 | January – February | March – April | February – October | May – December |
| Zone 8 | December – February | March – April | February – November | April – December |
| Zone 9 | November – January | February – March | January – November | April – December |
Complete Growing Guide
Start your chive journey with proper soil preparation. Work compost or well-aged manure into your planting area, aiming for soil that drains well but retains some moisture. Chives tolerate various soil types but truly shine in slightly alkaline conditions with a pH between 6.0-7.0.
For seed starting, you have two excellent options. Direct sowing works beautifully in spring after soil workability or in fall 6-8 weeks before hard frost. Scatter seeds thinly and barely cover with 1/4 inch of soil. For earlier harvests, start seeds indoors 8-10 weeks before your last frost date. Use seed starting mix and maintain 65-70°F soil temperature for optimal germination in 10-14 days.
Transplanting requires a gentle touch since chives develop into clumps naturally. Space transplants 6-8 inches apart, setting them at the same depth they grew in their containers. Water thoroughly after transplanting and maintain consistent moisture for the first two weeks while roots establish.
Fertilizing chives is refreshingly simple. Apply balanced organic fertilizer or compost in early spring, then step back. Over-fertilizing produces lush growth but diminishes the signature onion flavor. In zones 7-9, a light fall feeding helps maintain vigor through mild winters.
Avoid the common mistake of planting chives in heavy clay or waterlogged areas—they'll develop root rot quickly. Also resist the urge to harvest heavily during the first growing season. Let plants establish strong root systems for years of productive harvests ahead.
For maximum yields, divide established clumps every 3-4 years in early spring or fall. Simply dig up the entire clump, separate into smaller sections with roots attached, and replant. This prevents overcrowding and maintains vigorous growth. In zones 3-6, apply light mulch after the ground freezes for winter protection.
Harvesting
Begin harvesting chive leaves when plants reach 6-8 inches tall, typically 60-75 days from seed. Look for vibrant green, hollow leaves that stand upright—avoid yellowing or flattened foliage which indicates stress or overmaturity.
Harvest using the "haircut method"—cut leaves 2 inches above soil level with sharp scissors or garden shears. Never pull or tear leaves, as this damages the growing crown. Take no more than one-third of the plant at once to maintain vigor. Morning harvests after dew evaporates provide the most concentrated flavor.
For continuous production, harvest outer leaves first, working toward the center. Fresh growth emerges from the center, creating a renewable cycle. During peak growing season, you can harvest every 2-3 weeks. Don't forget the purple flowers—harvest them just as they open for the best texture and mildest onion flavor. Late-season flowers become tough and overly pungent.
Storage & Preservation
Fresh chives store best when treated like cut flowers. Trim stem ends and place in a glass of water, covering loosely with a plastic bag. Refrigerated this way, they'll maintain quality for 7-10 days. For shorter storage, wrap dry chives in damp paper towels and refrigerate for up to one week.
Freezing preserves chive flavor exceptionally well. Chop fresh leaves and freeze in ice cube trays with water or olive oil—perfect portions for cooking. Frozen chives work beautifully in cooked dishes but lose their crisp texture for fresh applications.
Dehydrating works but requires careful attention. Use the lowest heat setting and remove when leaves crumble easily. Store dried chives in airtight containers away from light. The flavor becomes more concentrated but loses the fresh, bright notes that make chives special.
History & Origin
Common chives (Allium schoenoprasum
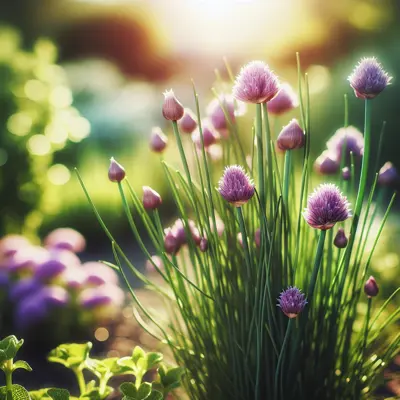
) represent one of humanity's oldest cultivated herbs, with archaeological evidence placing their use in European cuisines over 5,000 years ago. Native to temperate regions across Europe, Asia, and North America, wild chives grew naturally in rocky, mountainous areas from the Mediterranean to Siberia.
Medieval European monasteries cultivated chives extensively, both for culinary and medicinal purposes. Monks believed chives could ward off evil spirits and disease—while the evil spirits remain debatable, the herb's natural antimicrobial properties support the health claims.
Marco Polo documented chives growing wild across the Asian steppes, noting their importance in nomadic diets. These hardy perennials provided fresh nutrition when other vegetables were scarce. European colonists brought cultivated varieties to North America, though indigenous peoples were already utilizing native chive populations.
The variety we grow today remains virtually unchanged from these ancient origins, making common chives a true heirloom in every sense. Their genetic stability across millennia speaks to their perfect adaptation to diverse growing conditions.
Advantages
- +Exceptional cold hardiness surviving temperatures down to -40°F once established
- +Virtually maintenance-free after first season with no regular watering needed
- +Self-propagating through natural clump division, providing decades of harvests
- +Dual-purpose with edible flowers that attract beneficial pollinators
- +Natural pest deterrent when companion planted near roses and vegetables
- +Immediate regrowth after cutting with harvests possible every 2-3 weeks
- +Tolerates partial shade better than most herbs while maintaining flavor intensity
Considerations
- -Goes dormant in winter leaving no fresh harvests in zones 6 and below
- -Spreads aggressively through self-seeding if flowers aren't harvested regularly
- -Flavor diminishes significantly when dried compared to other preservation methods
- -Susceptible to onion thrips which can cause unsightly silver streaking on leaves
- -Requires division every 3-4 years or clumps become overcrowded and less productive
Companion Plants
Plant Together
Tomatoes
Chives repel aphids and may improve tomato flavor and growth
Carrots
Chives deter carrot fly and other root pests while improving carrot flavor
Roses
Chives repel aphids, black spot, and other rose pests naturally
Cabbage
Chives deter cabbage worms, aphids, and flea beetles from brassicas
Apple Trees
Chives help prevent apple scab and deter aphids from fruit trees
Lettuce
Chives repel aphids and slugs while not competing for nutrients
Peppers
Chives deter aphids and may enhance pepper growth and flavor
Strawberries
Chives repel slugs, aphids, and nematodes that damage strawberry plants
Keep Apart
Beans
Chives may inhibit bean growth and nitrogen fixation capabilities
Peas
Alliums like chives can stunt pea growth and reduce pod production
Pests & Disease Resistance
Resistance
Excellent disease resistance
Common Pests
Onion thrips, aphids
Diseases
Rust, downy mildew in humid conditions
