Progress No. 9
Pisum sativum 'Progress No. 9'
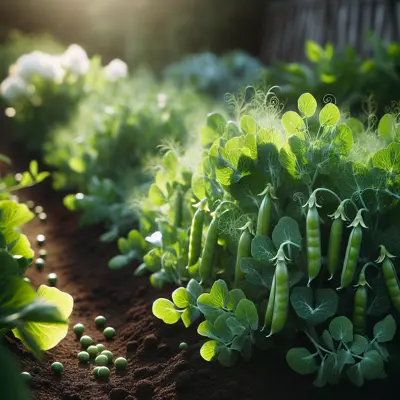
A dependable English shelling pea that has been a garden favorite since the 1930s, prized for its consistent production and excellent flavor. This compact, dwarf variety produces plump pods filled with 7-9 large, sweet peas that are perfect for fresh eating or preserving. Its reliable performance and disease resistance make it an ideal choice for beginning gardeners.
Harvest
60-65d
Days to harvest
Sun
Full sun to partial shade
Zones
2–11
USDA hardiness
Height
12-18 inches
Planting Timeline
Showing dates for Progress No. 9 in USDA Zone 7
All Zone 7 pea →Zone Map
Click a state to update dates
Progress No. 9 · Zones 2–11
Growing Details
Succession Planting
Progress No. 9 stops producing once daytime highs consistently hit 80°F, so the spring succession window is short. In zone 7, direct sow every 14–18 days starting in early March, with a hard stop by late April — you'll fit 2 to 3 rounds before heat shuts things down. A fall run is worth it too: count back 65 days from your first expected frost and sow in late August or early September, when soil temps are dropping back into the 60s and germination picks back up.
Skip any midsummer sowing to bridge the gap. Germination stalls in hot soil, Erysiphe pisi moves in fast on stressed plants, and the yield won't justify the bed space. Put something heat-tolerant there and come back to peas in fall.
Complete Growing Guide
Start preparing your garden bed in early spring, working in 2-3 inches of well-aged compost to improve soil structure without over-fertilizing—Progress No. 9 performs best in moderately fertile soil rather than rich, nitrogen-heavy beds that promote excessive foliage at the expense of pod production.
Direct sow your seeds 4-6 weeks before your last frost date when soil temperatures reach 45°F, though the variety tolerates light frosts down to 25°F. Plant seeds 1-2 inches deep and 2-3 inches apart in double rows spaced 6 inches apart, creating blocks rather than single rows for better support and higher yields per square foot. In zones 3-5, plant in mid-March; zones 6-7 can plant in late February; zones 8-9 should focus on fall plantings in September for best results.
Skip indoor starting—peas transplant poorly and direct sowing produces stronger root systems. Inoculate seeds with rhizobia bacteria before planting to enhance nitrogen fixation, especially in beds that haven't grown legumes recently. This step can increase yields by 20-30% in new gardens.
Provide support structures at planting time since Progress No. 9 reaches 18-24 inches tall. Use twiggy branches, short trellises, or wire hoops—the tendrils need something to grab onto for proper development. Without support, plants sprawl and pods touch soil, leading to rot and pest issues.
Water consistently but avoid overhead irrigation once flowering begins, as wet flowers are prone to fungal diseases. Apply 1 inch of water weekly at soil level, maintaining even moisture throughout pod development—irregular watering causes tough, starchy peas.
Avoid fertilizing with high-nitrogen feeds after planting. Instead, side-dress with compost tea or diluted fish emulsion once when plants are 4 inches tall, then switch to a low-nitrogen, phosphorus-rich fertilizer when flowers appear to support pod formation.
The biggest mistake gardeners make is planting too late in spring—Progress No. 9 stops producing when temperatures consistently exceed 75°F. For continuous harvests, make succession plantings every 2 weeks until 8 weeks before hot weather arrives, then resume plantings 10 weeks before first fall frost.
Harvesting
Begin checking pods 60-65 days from planting when they're bright green, plump, and filled but still glossy—dull pods indicate overmaturity and starchy peas. The pods should feel firm and well-filled when gently squeezed, with individual peas clearly visible but not bulging against the pod walls.
Perform the 'snap test' by gently bending a pod—it should snap crisply rather than bend limply. Open a test pod to check the peas inside; they should be bright green, sweet, and tender enough to eat raw. Once peas turn pale or yellowish, they've passed peak quality.
Harvest in early morning when pods are crisp and sugar content is highest, before heat stress affects the plants. Pick pods by holding the stem with one hand while gently pulling the pod with the other—yanking without support can uproot the shallow-rooted plants.
Harvest every 2-3 days during peak production to keep plants producing new pods. Progress No. 9 typically yields for 2-3 weeks if kept consistently picked. Leave any pods that become tough or yellowed on the plant to dry for seed saving, but remove them before they split to prevent self-seeding.
Storage & Preservation
Fresh Progress No. 9 peas maintain peak quality for only 2-3 days after harvest, so process them quickly. Store unhulled pods in perforated plastic bags in the refrigerator's crisper drawer at 32-35°F—never leave them at room temperature, as sugars rapidly convert to starch.
For freezing, blanch shelled peas in boiling water for 90 seconds, then immediately plunge into ice water. Drain thoroughly and freeze in portions you'll use for single meals. Properly frozen peas maintain quality for 8-12 months.
Progress No. 9 excels for canning using the pressure canning method—the large, uniform peas hold their shape well. Follow USDA guidelines for processing times based on your altitude.
Dried peas from fully mature pods make excellent split pea soup. Allow pods to dry completely on the plant until they rattle, then shell and store dried peas in airtight containers. They'll keep for years in cool, dry conditions and provide protein-rich meals through winter.
History & Origin
Progress No. 9 was developed in the 1920s by Thomas Laxton Ltd., the renowned English seed company founded by the pioneering pea breeder Thomas Laxton in Bedford, England. Released commercially in the early 1930s, it was part of Laxton's "Progress" series of dwarf shelling peas designed to provide reliable yields in smaller gardens while maintaining the exceptional flavor of traditional English varieties.
The variety gained popularity during World War II victory garden campaigns when its compact size, disease resistance, and dependable production made it ideal for home food production. American seed companies began offering Progress No. 9 in the 1940s, and it became a staple in suburban gardens during the post-war gardening boom.
Laxton's breeding program focused on combining the best traits of older English varieties with improved disease resistance and shorter stature suitable for mechanized cultivation. Progress No. 9 represents this philosophy perfectly—it maintains the sweet, tender characteristics of heritage English peas while offering the reliability modern gardeners need.
Today, Progress No. 9 is considered an heirloom variety, preserved by seed savers who appreciate its consistent performance and authentic English pea flavor that connects modern gardens to nearly a century of gardening tradition.
Advantages
- +Exceptional cold tolerance allows planting 4-6 weeks before last frost when soil is barely workable
- +Compact 18-24 inch height perfect for small gardens and doesn't require tall support structures
- +Strong disease resistance to fusarium wilt and pea mosaic virus prevents common crop failures
- +Pods hold 7-9 large, uniform peas making shelling efficient and worthwhile
- +Reliable 60-65 day maturity allows precise harvest planning and succession planting
- +Self-supporting dwarf habit with strong stems resists lodging in wind and rain
- +Outstanding flavor retention when frozen makes it excellent for food preservation
Considerations
- -Short 2-3 week harvest window requires careful timing and frequent picking
- -Heat sensitivity stops production when temperatures exceed 75°F consistently
- -Shallow root system makes plants susceptible to drought stress and easy to uproot when harvesting
- -Requires inoculation with rhizobia bacteria in new garden beds for optimal nitrogen fixation
- -Pods must be harvested promptly as they become tough and starchy quickly when overripe
Companion Plants
Carrots and radishes are the most practical neighbors here — their roots run deeper than peas' shallow 6–12 inch zone, so they're not competing for the same resources. Radishes can go in the same row at sowing to break soil crust and mark the line while the peas are still underground. Spinach and lettuce fit neatly under the 12–18 inch canopy once pods start forming, using space that would otherwise go to weeds. Nasturtiums pull their weight by drawing parasitic wasps that keep pea aphid (Acyrthosiphon pisum) populations in check. Keep onions, garlic, and fennel on the other side of the garden — alliums stunt legume root development, and fennel suppresses most nearby vegetables through root exudates.
Plant Together
Carrots
Loosen soil for pea roots and don't compete for nutrients
Spinach
Cool-season companion that uses nitrogen fixed by pea roots
Marigolds
Repel aphids and other pests that commonly attack peas
Nasturtiums
Act as trap crop for aphids and cucumber beetles
Radishes
Break up soil and mature quickly before peas need full space
Lettuce
Shallow roots don't compete and benefits from nitrogen fixed by peas
Mint
Repels aphids and ants that can damage pea plants
Chives
Repel aphids and improve overall garden pest management
Keep Apart
Onions
Can inhibit pea growth and nitrogen fixation ability
Garlic
Allelopathic compounds can stunt pea growth and development
Fennel
Inhibits growth of most garden plants including peas through allelopathy
Nutrition Facts
Per 100g serving. % Daily Value based on 2,000 calorie diet. Source: USDA FoodData Central (FDC #170419)
Pests & Disease Resistance
Resistance
Good resistance to fusarium wilt and pea mosaic virus
Common Pests
Pea aphid, cutworms, pea weevil, slugs
Diseases
Powdery mildew, root rot, bacterial blight, downy mildew
Troubleshooting Progress No. 9
What you'll see, why it happens, and what to do about it.
White powdery coating on upper leaf surfaces and stems, typically appearing as plants mature or daytime temps climb past 70°F
Likely Causes
- Powdery mildew (Erysiphe pisi) — airborne spores spread fast in dry air at moderate temps; unlike most fungal diseases, it doesn't need wet leaves to take hold
- Crowded spacing under 3 inches that cuts airflow between plants
What to Do
- 1.Pull and trash heavily infected foliage — don't compost it
- 2.Space plants at least 3–4 inches apart and prop them off the ground with a low trellis or pea brush to keep air moving
- 3.If the crop is at day 60 or beyond and pods are mostly filled, just harvest what's left and pull the plants; a spray program at that stage doesn't pencil out
Seedlings collapsing at soil level or failing to emerge, especially after a cold, wet stretch in early spring
Likely Causes
- Root rot caused by Pythium or Fusarium spp. — both are soil-borne and activated by waterlogged ground below 45°F
- Planting into flat, poorly drained beds where cold water sits around the seed
What to Do
- 1.Sow into raised or ridged beds — the UGA Vegetable Garden Calendar specifically recommends ridge planting for early spring crops to improve drainage and speed soil warm-up
- 2.Wait until soil temps reach at least 45°F before sowing; germination stalls below that and rot risk climbs
- 3.If Fusarium has hit a bed before, keep peas out of that ground for at least 2 seasons
Distorted shoot tips and sticky residue on leaves, sometimes with a black sooty coating developing a week or two later
Likely Causes
- Pea aphid (Acyrthosiphon pisum) — colonies form on new growth and leaf undersides, and the honeydew they excrete is what the sooty mold fungus colonizes
- Soft, fast-growing shoots from over-fertilizing with nitrogen, which is exactly what aphids prefer
What to Do
- 1.Knock aphids off with a hard spray of water early in the morning so foliage dries before evening
- 2.Interplant with nasturtiums — they draw parasitic wasps and other aphid predators, and a heavily colonized nasturtium is easier to pull than a colonized pea row
- 3.Skip the nitrogen side-dress entirely; peas fix their own nitrogen through root nodules and added N just pushes the lush, tender growth that invites infestation
Frequently Asked Questions
How long does Progress No. 9 take to grow from seed to harvest?▼
Is Progress No. 9 good for beginner gardeners?▼
Can you grow Progress No. 9 in containers?▼
What does Progress No. 9 taste like compared to other peas?▼
When should I plant Progress No. 9 for fall harvest?▼
Why are my Progress No. 9 peas tough and starchy instead of sweet?▼
Zone-by-Zone Planting Calendar
| Zone | Indoor Start | Transplant | Direct Sow | Harvest |
|---|---|---|---|---|
| Zone 3 | — | — | May – June | July – October |
| Zone 4 | — | — | April – June | June – October |
| Zone 5 | — | — | April – May | June – November |
| Zone 6 | — | — | April – May | June – November |
| Zone 7 | — | — | March – May | May – November |
| Zone 8 | — | — | March – April | May – December |
| Zone 9 | — | — | February – March | April – December |
| Zone 10 | — | — | January – March | March – December |
| Zone 1 | — | — | June – July | August – September |
| Zone 2 | — | — | May – July | July – September |
| Zone 11 | — | — | January – February | February – December |
| Zone 12 | — | — | January – February | February – December |
| Zone 13 | — | — | January – February | February – December |
Growing Guides from Wind River Greens
Sources & References
External authority sources used in compiling this guide.
See the Methodology page for how this data is sourced, what's AI-assisted, and known limitations.
More Peas
Build your planting calendar
Get a month-by-month schedule of when to start, transplant, and harvest.